Feeds:
Posts
Comments

Archive for the ‘Bake’ Category

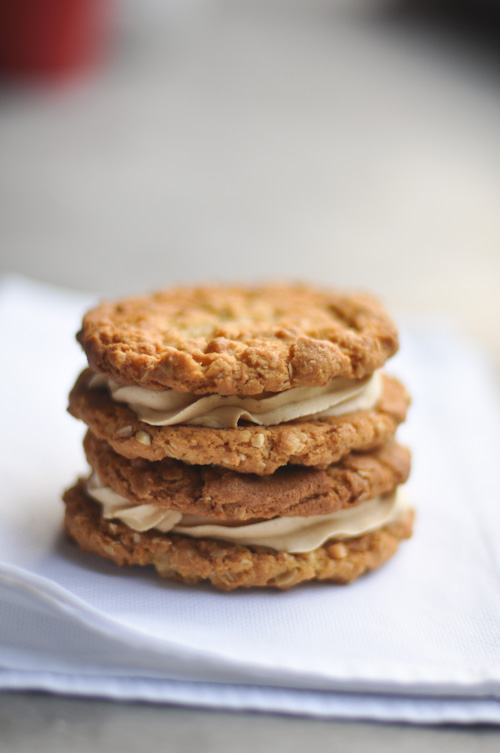
The other day my husband was raving about a cookie he had tried in a cafe. He said they were called “Nutter Butters” and they cost $5 each. $5 for a cookie?!? I was pretty surprised that someone would pay that much for one. I knew I could easily make these for a fraction of the price. I found a few recipes online, one of them actually coming from the cafe where he first tried the nutter butters – but in the end I decided to go with Thomas Keller’s recipe. Making your own cookies at home results in a nuttier, yummier and I should add – cheaper cookie. The cookies look really impressive but there is really very little effort involved in making them. The recipe was such a hit that there was a serious argument between me and my husband about how we would allocate the 8 nutter butters (i.e. how many would he eat, how many would I eat and how many we could afford to give away!)… and resulted in me making a second batch the next day.

Nutter Butter Cookies

Nutter Butter Cookies

Nutter Butter Cookies

Makes 8 large cookies, recipe from Bouchon Bakery

  • 140 grams flour
  • 1 teaspoon baking powder
  • 2 teaspoons baking soda
  • 115 grams butter, softened
  • 80 grams peanut butter
  • 110 grams caster sugar
  • 95 grams brown sugar
  • 1 egg
  • 40 grams unsalted, roasted and chopped
  • 100 grams quick cooking oats

Peanut Butter Icing

  • 90 grams butter, softened
  • 105 grams peanut butter
  • 140 grams icing sugar
  1. Mix the flour, baking powder and baking soda in a bowl and set aside. Pre-heat the oven to 175 c (fan forced). If conventional oven, heat the oven to 190c.
  2. In a stand mixer, using the paddle attachment, mix the butter and peanut butter until light coloured and creamy, around 3 minutes. Add the sugars and continue to mix on medium speed for 5 minutes, scrapping down the bowl twice during the process. Add the egg and mix on medium until fully incorporated.
  3. Now, add the flour mixture and mix on low, around 1 minute then add the nuts and oatmeal, and mix on low just until combined.
  4. Using an ice-cream scoop, take some of the mixture place around 5 cm apart on a baking tray. Alternatively, you can use a spoon and roll the mixture into balls (using gloves makes it easier). Bake the cookies for 10 to 12 minutes until golden brown. Remove from oven and allow to cool.
  5. In the meantime, make the filling. Mix the peanut butter, butter and icing sugar in a mixing bowl fitted with a paddle attachment. Place the mixture in a piping bag fitted with a star nozzle.
  6. Once the cookies are cool, take one cookie and pipe some of the peanut butter icing and cover with another cookie. Continue until all cookies are filled.

Read Full Post »

Salted Caramel Eclairs

Salted Caramel Eclairs

I was lucky enough to receive book called “Secrets of Eclairs” by Marianne Magnier-Moreno from my sister and have been thinking it was about time I started learning to make eclairs. She also gave me a jar of Laduree Salted Caramel sauce (I don’t know what I’ve done to deserve all these goodies!). I’ve never had a sweet tooth but the sauce was heavenly! What better way to put these two to use than by making Salted Caramel eclairs?

There are a few tricks to making the choux pastry – the ones that stand out for me (1) dry the choux pastry out (called panade) after adding the flour (2) know when to stop adding the egg to ensure pipeable consistency (3) never open the oven door while baking and (4) ensure the pastry has dried out completely before removing from the oven (I know – how can you ensure the pastry is dry when you can’t open the oven door?!?).

Let me tell you now, the recipe is not complicated to make but it does take some time so allocate half a day to make these or alternatively, you can make the choux pastry (store in an airtight container at room temperature if not using immediately) and the creme patisserie ahead of time and then assemble right before serving. Believe me, the effort is worth it!

Salted Caramel Eclairs

For the Choux Pastry (Makes about 18 to 20 pieces)

  • 125 ml milk
  • 125 ml water
  • pinch of salt
  • 10 grams sugar
  • 100 grams butter
  • 150 grams flour, sifted
  • 4 eggs, beaten (around 200 grams)
  1. Place the milk, water, salt, sugar and butter in a saucepan and heat until the butter has melted.
  2. Remove the pan from the heat and add the flour all at once. Stir the flour off the heat for a minute and then place the mixture back on the heat to dry out the pastry for around 5 minutes. Make sure to stir the choux mixture vigorously, over a medium heat.
  3. Remove the choux mixture from the pan and tip it in to a stand mixer. Using the paddle attachment, beat this mixture over a medium speed and gradually add the beaten eggs, a quarter at a time and make sure the egg is fully incorporated before adding more.
  4. When you’ve added around 3/4 of the egg mixture in, check whether the batter is ready. To do this, scoop some of the batter on to a spatula. If the mixture adheres to the spatula and then falls off, it’s just right. If it does not stick to the spatula, it’s too dry, add the egg mixture a little bit at a time until you get the right consistency. The idea is that if you pipe the mixture, it can hold it’s shape. (The first time I did this, I added all eggs in, and the mixture was too runny, the eclairs didn’t rise)
  5. Pre-heat the oven to 180 c
  6. Place the choux pastry in a piping bag fitted with a star nozzle that is 1.5cm thick and put in the refrigerator to allow to cool slightly.
  7. In the meantime, get some baking paper and you’re ready to create guides which will help you as you pipe the mixture. Using a ruler and a marker, draw rectangles that are 10 cm long and 2.5 cm wide, spaced around 4 cm apart. Place another sheet of baking paper over the guide.
  8. Take the mixture from the refrigerator and carefully pipe on to the baking paper, using the marked baking paper as a guide.
  9. Lightly spray some water over the piped choux pastry and place in the oven. Bake for 20 minutes and then lower the heat to 150 and bake another 20 minutes. Once done, turn off the oven and leave the pastry in, another 5 minutes. (Never open the oven door while baking the eclairs as this will cause it to deflate) Remove the pastry from the oven.
  10. When the pastry has cooled, use a serrated knife to cut along the tops of the pastry and fill with the creme patisserie (recipe below)

Creme Patisserie

  • 300 ml milk
  • 1 teaspoon vanilla extract
  • 100 grams sugar
  • 90 grams cornstarch
  • 1 egg yolk
  • 80 ml milk
  • 100 grams butter
  • 500 to 600 ml thickened cream
  • Salted Caramel sauce to finish the eclairs
  1. Heat the 300 ml of milk over a low heat. Add the vanilla.
  2. In a bowl, combine the sugar, cornstarch and egg yolk. Mix thoroughly then add the 80 ml of milk. Add this mixture to the 300 ml of milk and allow to thicken, using a whisk to stir the mixture. When the mixture has boiled, quickly take it out of the heat and place in a stand mixer. Allow the mixture to cool around 5 minutes. Using a whisk attachment, gradually add the butter until it is fully incorporated. Place the custard in a bowl and cover with clingfilm. Place in the refrigerator for around an hour.
  3. When the custard has cooled, take it out of the refrigerator and give it a good mix to loosen it slightly. Weigh the custard mixture. Let’s say the mixture weighs around 550 grams, take the same amount of cream and whisk it using a stand attachment to stiff peaks. Before adding the cream, add around 50 grams of the salted caramel sauce to the custard. Then, add 1/3 of the cream to the custard until well combined then carefully fold in the rest of the cream to lighten the mixture.
  4. Place the creme patisserie on to a piping bag fitted with a very small round tipped nozzle (about 6mm). Make three holes on the bottom of the eclair and pipe the cream patisserie filling.
  5. To finish the eclairs, spread some salted caramel over the eclairs and top with some sea salt flakes. Salted Caramel sauce can be bought or otherwise, you can use the recipe here (just skip step 7).

Read Full Post »

Leche Flan

Leche Flan

My two sisters are great cooks and while I love to cook for everyone in the family, once in awhile I like to sit back and enjoy their great food. This weekend the family celebrated Easter lunch at my place and I asked my eldest sister to make her Leche Flan. This dessert is the Filipino version of creme caramel. I’ve always thought a great leche flan/creme caramel is very intimidating to make. I prefer one that has a very smooth texture and a dark, almost bitter, caramel sauce. My sister however thinks it’s the easiest dessert to make and hers comes out perfectly every time. The recipe was passed down from my Grandmother and it takes less than ten minutes to put everything together and around 40 minutes to cook. Very minimal effort for an impressive dessert.

Leche Flan (Filipino Style Creme Caramel)

  • 1 cup sugar
  • 375 ml evaporated milk
  • 3/4 cup sugar (additional)
  • 5 egg yolks plus 1 egg
  • 1 teaspoon vanilla beans
  1. Boil the sugar in the sauce pan until dark brown and pour in a 23 cm metal cake pan and allow to harden.
  2. In a sauce pan, combine the evaporated milk, 3/4 cups sugar, vanilla beans and eggs, whisk lightly. Place over a gentle heat and mix gently for a few seconds (you don’t want the eggs to cook). Pour the milk and egg mixture into the cake pan. Cover with foil.
  3. Steam the flan over slow heat for 40 to 45 minutes until the flan is set.
  4. Allow the flan to cool. Refrigerate the flan for a few hours. When ready to serve, run a knife around the sides of the cake pan. Place a large serving plate over the cake pan and flip over. Pour the extra caramel over the flan.

Read Full Post »

Pash rides the ferry

Pash rides the ferry

Momofuku Milk Bar Pistachio Cake

Fear is not in the vocabulary of my seven month old puppy, Pash.  That is, until last weekend when, for the first time, we took her on a ferry ride.  As we queued to ride the ferry, you could see the anxiety in her eyes and hesitation in her steps.  “Come on Pash, let’s go!” I told her impatiently – there were a number of people behind us but she refused to move.  Trembling with her tail between her legs she finally inched forward behind my older, more confident dog, Baci.

I could relate.  There aren’t many things that faze me in the kitchen.   While I can appreciate simple home cooked meals, I like the challenge of making more complicated dishes.  The more steps and techniques, the more interesting for me.  It keeps me occupied.

The exception to this would be anything from Christina Tosi’s Milk Bar Cookbook,  especially her layered cakes which feature enough recipes within recipes to strike fear in your heart.  Every time I had a look at the cookbook I promised myself that I would try any one of the layered cakes but the minute I started reading a recipe, the heart would start racing and I’d break out in a cold sweat.

But hey, if Pash could get on that ferry – maybe I could attempt to make one of her cakes?

Pistachio Cake, Lemon Curd, Milk Crumbs

Pistachio Cake, Lemon Curd, Milk Crumbs

So here’s my attempt at facing my fear of layered cakes….  A total of four recipes – pistachio cake, lemon curb, milk crumbs and pistachio frosting is definitely not for the faint hearted.

In the end I had to make my own pistachio paste and half way through my durable thermomix refused to grind any further and there was a horrifying error message.   I had to give it a rest for the night.  I started early the next morning and several times during the day I asked myself whether I had taken on more than I could chew.  More than 12 hours later, my kitchen looked like a war zone and I was exhausted.

But let me tell you, that cake… was worth it!

Pistachio Cake, Lemon Curd, Milk Crumbs

Pistachio Cake, Lemon Curd, Milk Crumbs

Momofuku Milk Bar Pistachio Layer Cake

Makes 1 (6-inch) Layer Cake, 5 to 6 inches tall; Serves 6 to 8

  • 1 Recipe Pistachio Cake
  • 65 grams Pistachio Oil
  • 1 Recipe Lemon Curd
  • 1/2 Recipe Milk Crumb
  • 1 Recipe Pistachio Frosting

You will also need 1 (6 inch) cake ring and 2 strips acetate, each 3 inches wide and 20 inches long.
Note: Grapeseed oil can be substituted for the pistachio oil, but part of the toasted pistachio depth of flavour will be lost.

  1. Put a piece of parchment on the counter. Invert the cake onto it and peel off the parchment from the bottom of the cake. Use the cake ring to stamp out 2 circles from the cake, these are your top 2 cake layers. The remaining cake “scrap” will come together to make the bottom layer of the cake.
  2. For the first layer, clean the cake ring and place it in the center of the sheet pan lined with clean parchment. Use 1 strip of acetate to line the inside of the cake ring. Put the cake scraps inside the ring and use the back of your hand to tamp the scraps together into a flat even layer. Dunk a pastry brush in the pistachio oil and give the layer of cake a good healthy bath of half of the oil. Use the back of the spoon to spread half of the lemon curd in an even layer over the cake. Sprinkle one-third of the milk crumbs evenly over the lemon curd. Use the back of your hand to anchor them in place. Use the back of a spoon to spread one third of the pistachio frosting as evenly as possible.
  3. For layer two, with your index finger, gently tuck the second strip of acetate between the cake ring and the top 1/4 inch of the first strip of acetate, so that you have a clear ring of acetate 5 to 6 inches tall – high enough to support the height of the finished cake. Set a cake round on top of the frosting, and repeat the process for layer 1 (if 1 of your 2 cake rounds is jankier than the other, use it here in the middle and save the prettier one for the top).
  4. For layer three, nestle the remaining cake round into the frosting. Cover the top of the cake with the remaining frosting. Give it volume and swirls, or you can opt for a perfectly flat top. Garnish the frosting with the remaining milk crumbs.
  5. Transfer the sheet pan to the freezer and freeze for a minimum of 12 hours to set the cake and filling. The cake will keep in the freezer for up to 2 weeks.
  6. At least 3 hours before you are ready to serve the cake, pull the sheet pan out of the freezer and, using your fingers and thumbs, pop the cake out of the cake ring. Gently peel off the acetate, and transfer the cake to a platter or cake stand. Let it defrost in the fridge for a minimum of 3 hours (wrapped well in plastic, the cake cake be refrigerated for up to 5 days). Slice the cake and serve.
Pash takes a ferry ride

Pash takes a ferry ride

Pistachio Cake

Makes 1 quarter sheet pan cake

  • 190 grams pistachio paste
  • 75 grams glucose
  • 6 egg whites
  • 280 grams confectioners’/icing sugar
  • 110 grams almond meal/flour
  • 75 grams pistachio oil (can use grapeseed as a substitute)
  • 55 grams heavy cream
  • 160 grams flour
  • 6 grams baking powder
  • 6 grams kosher salkt
  1. Heat the oven to 175 c. Combine the pistachio paste and glucose in the bowl of a stand mixer fitted with a paddle attachment and beat on medium low for 2 to 3 minutes, until the mixture turns into a sticky green paste. Scrape down the sides of the bowl with a spatula.
  2. On low speed, add the egg whites one at a time, being careful not to add the next egg white until the previous one is completely incorporated. Stop the mixer and scrape down the sides of the bowl with a spatula after every 2 to 3 egg whites.
  3. Add the icing/confectioners’ sugar and almond meal and, on low speed, paddle them in for 2 to 3 minutes, until the mixture thickens. Stop the mixer and scrape down the sides of the bowl. Stream in the pistachio oil and heavy cream and paddle on low speed for 1 minute. Stop the mixer and scrape down the sides of the bowl.
  4. Add the flour, baking powder, and salt and paddle on low for 2 to 3 minutes, until the batter is super smooth.
  5. Spray a quarter sheet pan and line it with parchment paper. Using a spatula, spread the cake batter in an even layer in the pan. Bake for 20 to 22 minutes. At 20 minutes, gently poke the edge of the cake with your finger; the cake should bounce back and it should be slightly golden brown on the sides and pulling away from the sides of the pan ever so slightly. Leave the cake in the oven for an extra 1 to 2 minutes if it doesn’t pass these tests.
  6. Take the cake out of the oven and cool on a wire rack or in a pinch, in the fridge or freezer, wrapped in plastic wrap for up to 5 days.

Lemon Curd

  • 3 lemons
  • 100 grams sugar
  • 4 eggs
  • 1 gelatin sheet
  • 115 grams butter, very cold
  • 2 grams salt
  1. Zest the lemons. Put the sugar, lemon zest and 80 grams of lemon juice in a blender and blend until the sugar granules have dissolved. Add the eggs and blend on low until you have a bright yellow mixture. Transfer the contents to a medium pot or sauce pan. Clean the blender canister.
  2. Bloom the gelatin by placing this sheet in a bowl with cold water for a few minutes to soften.
  3. Heat the lemon mixture over low heat, whisking regularly. As it heats up, it will begin to thicken; keep a close eye on it. Once it boils, remove it from the stove and transfer it to the blender. Add the bloomed gelatin, butter, and salt and blend until the mixture is thick, shiny and super smooth.
  4. Pour the mixture through a fine mesh sieve into a heat proof container and put in the fridge until the lemon curd has cooled completely, at least 30 minutes. This can be refrigerated for up to 1 week.

Pistachio Frosting

  • 115 grams butter, at room temperature
  • 40 grams icing/confectioners’ sugar
  • 230 grams pistachio paste
  • 2 grams kosher salt
  1. Combine the butter and sugar in the bowl of a stand mixer fitted with a paddle attachment and cream together on medium high for 2 to 3 minutes, until fluffy and pale yellow.
  2. Add the pistachio paste and salt and mix on low speed for half a minute, then kick up the speed to medium high for 2 minutes. Scrape down the sides of the bowl.
  3. Use the frosting immediately, or store it in an airtight container for up to one week.

Milk Crumbs
Recipe can be found here.

Read Full Post »
Pumpkin and Ricotta Lasagna

Pumpkin and Ricotta Lasagna

I had a friend who was visiting for a few days and I found out that she had stopped eating meat since the last time I saw her.  On a whim, I told her that I too would give up meat.   If you read my blog, you’ll notice that I’ve always loved cooking/eating meat and there are a considerable number of recipes penned here.  So while the decision to do this was initially born out of curiosity to see if I could last a few days, I knew lasting more than a week wasn’t going to be easy.  I don’t know how long this will last – a few more weeks?  Months perhaps?  Forever?  I’m not really sure but for the meantime, I’m starting to enjoy the challenge of making tasty and meatless dinners.

This is one of those meatless dishes that I could happily eat everyday.  Think layers of creamy pumpkin puree and ricotta in between sheets of homemade pasta – believe me – it’s enough to convert any carnivore.

A little note about the recipe – it’s very simple to put together – unless you’re like me where you want to complicate things and make your own pasta (it’s worth it though) – but if you’re pressed for time, use store bought lasagna sheets.  Also, the pumpkin puree is delicious as a side dish too.

“I’m vegetarian!” I told proudly told a  work colleague during drinks one day.

“Since when?”  he asked.

“Wait a second,” another friend interrupted.  “Didn’t you just put that pate in your mouth?”  She asked.

“Ahh… actually I still eat chicken… and sesafood.” I clarified.

Vegetarian… almost.

Pumpkin and Ricotta Lasagna

Pumpkin and Ricotta Lasagna

Pumpkin and Ricotta Lasagna with Sage, Hazelnuts and Burnt Butter Sauce

Serves 4

  • 1 kilo Pumpkin
  • 150 grams unsalted butter plus 50 grams butter
  • 1 vanilla bean, scraped
  • 400 grams ricotta
  • 1 egg
  • pinch of nutmeg
  • Salt and pepper to taste
  • 1 recipe pasta (see here)
  • 100 grams parmesan cheese
  • 10 sage leaves
  • 20 grams toasted hazelnuts
  1. To make the pumpkin puree, peel the pumpkin and diced into 2 inch cubes. Heat the 150 grams of butter in a pan and add the pumpkin once the butter is melted. Add the vanilla bean and scraped seeds and cook the pumpkin until soft enough that you can cut it with a spoon, around 20 minutes. Stir the pumpkin once in a while to make sure that the pumpkin doesn’t catch to the bottom of the pan. Once the pumpkin is soft enough, blend or process the pumpkin until smooth. Set aside.
  2. Mix the ricotta, egg and nutmeg together in a bowl. Season with salt and pepper. Set aside
  3. Grease a baking pan with some olive oil and lay sheets of cooked pasta to cover the bottom of the pan. Layer a third of the pumpkin puree and top with more of the lasagna sheets.
  4. Top with a third of the ricotta mixture and the cover again with more lasagna sheets.
  5. Now add half of the remaining pumpkin puree and cover with the lasagna sheets. Add half of the remaining ricotta and again, more lasagna sheets. Finally, spread the remaining pumpkin puree and on top of this add the rest of the ricotta. Top with parmesan cheese.
  6. Bake the lasagna in a pre-heated oven at 180c (fan forced) for 30 minutes, or until the cheese is golden brown.
  7. Heat the remaining butter along in a small sauce pan until it goes nutty brown. Add the sage leaves and to crisp them up. Top with the toasted hazelnuts.
Pumpkin and Ricotta Lasagna

Pumpkin and Ricotta Lasagna

On another note, the Council of Italian Restaurants Association (CIRA) has just posted their latest class schedule for June/July/August.  If you are interested in attending any of their classes, email cira@cira.com.au or follow @italcira on twitter for more details.

Read Full Post »

Chicken Pie - inspired by Maggie Beer

Chicken Pie - inspired by Maggie Beer

My home is located at the bottom of a very hilly area. Each morning, I get up and take my dogs for a walk up and down a series steep inclines to reach the peak. The task is arduous and always leaves me out of breath. But it’s worth it since I know that once I reach the bottom at the other side, lies the most amazing view of the harbour and the city as the sun greets Sydney good morning. The first time I climbed the hill was torture and even worse when I had reached the bottom knowing I had to climb the same rolling hills to get back home. If I miss a few days, I still find myself out of breath and need to stop along the way for a rest. My lack of fitness is a far cry from years back when I managed to run eight kilometers without breaking a sweat.

Early on, I would see runners pass me by, easily scaling the inclines that leave me gasping for air thinking “One day… I’ll get back into shape and run all the way up and down like they do!”

That was more than two years ago. For some reason, I always had an excuse not to follow through – I was too tired, too lazy, No time, maybe after Christmas, maybe after Easter… and then I stopped bothering to make excuses and decided to keep walking.

And then one day some one told me to stop with the excuses and “just get over it”.

So the next day, I put on my running shoes and ran.

I stopped to rest eight times that day. My legs felt like lead and my chest like it was about to burst. Halfway through I contemplated walking home but somehow I managed to make it home swearing I would never do it again.

The next day, I ran again.

Tomorrow – rain or shine… will be day five.

I am sure we all have our demons holding us back but sometimes we just have to “get over it” and put on our running shoes, climb those hills, knowing that the view on the other side will be worth it.

Chicken Pie inspired by Maggie Beer

Chicken Pie inspired by Maggie Beer

Chicken Pie inspired by Maggie Beer

This chicken pie was one of those dishes that I needed to “get over” as well. This dish is influenced by Maggie Beer’s Pheasant Pie which I had been meaning to make months ago after watching her on Masterchef.  I finally, managed to make it over the weekend.  I’ll be upfront – this dish takes a lot of effort, the pie crust, roasting the chicken, making the filling, baking… but I have never ever tasted a better pie.  My husband says he can’t eat any other chicken pie after this.   Toasted walnuts, fresh herbs folded through a creamy chicken and mushroom filling lifted by hints of orange is unforgettable!

Also, the pastry is quite easy to work with and tastes amazing.  I am already thinking of other fillings to go with it!
For the chicken and marinade

  • 1.2 to 1.4 kilo whole chicken
  • 60 ml olive oil
  • Juice of one orange (separate the zest for the pie)
  • 8 sprigs thyme
  • 4 bay leaves

For the filling

  • 60 grams butter
  • Extra virgin olive oil
  • 4 cloves garlic, finely diced
  • 2 tablespoons fresh rosemary, finely chopped
  • 350 grams portobello mushrooms, finely diced
  • 1 teaspoon sea salt
  • 40 grams flour
  • 200 ml hot chicken stock
  • 80 grams creme fraiche (or fresh cream)
  • 40 grams walnuts, toasted
  • zest of 1 lemon
  • zest of 1 orange (see above)

Sour Cream Pastry

  • 200 grams unsalted butter, chilled
  • 250 grams plain flour
  • 125 ml sour cream

Glaze

  • 1 egg yolk
  • 1/2 tablespoon milk
  • good pinch salt

To make the sour cream pastry

  1. To make the sour cream pastry, pulse the butter and flour in a food processor until it looks like breadcrumbs. Add the sour cream and continue to pulse until the dough starts to incorporate into a ball. Wrap in plastic film and refrigerate for 20 minutes.
    Roll the pastry to desired thickness and cut 2 circles, 1 for the base of the pie, at approximately 27cm , and 1 for the lid at approximately 21cm. Line a pie tin with the larger dough then rest both in the refrigerator.

For the pie

  1. Preheat the oven to 200 C. To prepare the chicken, with a sharp knife, cut the tips off the wings. With the chicken breast up, make a small cut on each side in between the leg and the breast and dislocate each leg at the socket by bending them back. Then to break the back of the bird, hold the ‘parson’s nose’ end of the bird and apply pressure to snap the backbone. Twist the legs 180 degrees, so the breast of the chicken and the skin side of the legs are facing up. Separate the legs from the body of the chicken.
  2. Season the chicken with salt and pepper. Place the chicken (skin side up) and the marinade ingredients in a roasting pan and allow the mixture to marinate for at least 10 minutes (I let mine marinate for 30 minutes).
  3. Place the chicken in the preheated oven for around 40 to 45 minutes until cooked through. Remove from the oven and allow to cool. When cool enough to handle, debone the chicken.
  4. Increase the oven heat to 230 c.
  5. In a large frying pan, melt the butter, then gently fry the garlic, rosemary and then add the mushrooms. Sauté until mushrooms are soft and have reduced by half in size. You may need to add some extra virgin olive oil for frying. Season with salt. Add the flour to the pan and cook out for around 3 minutes, then pour in the hot chicken stock. Bring the mixture to the boil, then stir in the crème fraiche and reduce to a simmer. Cook the mixture for 15 minutes until it has thickened, check the seasoning
  6. Add the chicken and walnuts, lemon and orange zest, land allow to cool for at least 15 minutes in the refrigerator.
  7. To make the glaze, beat the egg yolk, milk and salt together.
  8. To assemble the pie, remove the pastry from the refrigerator, spoon the filling into the pie tin and cover with the pastry lid. Crimp the edges to seal and brush with the glaze. Take a sharp knife and score the top of the pie into a criss cross pattern.
  9. Place the pie back into the refrigerator and allow to rest for a further 10 minutes.
  10. Place the pie in the oven and allow to cook for 5 minutes at 230 c (fan forced), drop the temperature down to 220 c and allow the pie to cook until golden and cooked through. If the top is browning too much, cover with some foil until the dough is cooked through. Remove from the oven and allow to rest while you make the jus.
  11. To make the jus, take the temperature down to 180 c and place the roasting pan back into the oven with 500 ml stock. Cook in the oven for 15 minutes. Remove the roasting pan from the oven and strain into a sauce pan and cook until further reduced to a nice sticky glaze.

Read Full Post »

Eton Mess

Eton Mess

In my sophomore year of high school I met two girls who would soon become my best friends.  At first glance, it was an unlikely friendship.  One of them was a champion equestrienne who also made it to class president, and the other was a self described tomboy because she said she loved sports and rock music, except that everyone else thought she was a was a heartthrob.  And then there was me.  Truth be told, I felt very boring beside them – no hobby to keep me busy, I had no inclination to excel at school and had no string of admirers in the background.   But despite all this, somehow, we just clicked.  We’d take turns having sleep overs at each others houses, chatting until all hours of the morning about boyfriends (theirs) and heartbreaks (also theirs).  We also talked about what we were going to do and where we were going to be “ten years from now” (we all wanted to be lawyers) as we gorged on junk food until we felt sick.  We called ourselves PT&T, the first initials of our names.

One of the things we always agreed on was that we would make sure to go to the same University when we graduated.  Which, for one reason or another, never happened.  In fact, we all went to different schools and all took different courses. After University, I went to work for a bank, one of them continued her passion of horse jumping (and yes, eventually made it to the Olympics!), and the other one continued to break hearts and became a TV personality.

Despite the lack of contact, we were still always fiercely loyal and protective of each other.  I remember once when I started dating my now husband, he told me that the “P” of PT&T had told a friend of his that “he’d better make sure to treat Trissa well, otherwise, she would come looking for him”…. and, when it really mattered (like my wedding), we would still be there for each other (they were my bridesmaids).

Sadly, years have passed since I last saw them both.  Once in awhile, we text or email each other a birthday or Christmas greeting… but we’re all living on different continents and have gone on to do totally different things… as I said – it was an unlikely friendship.

But I’m still hopeful that one day we’ll have a PT&T reunion – and I know when we do – the conversation will pick up as if we were back in one of our houses, having another one of those sleepovers where there really is no sleeping – just lots of talking and making up for lost time… and of course, still gorging on the junk food.

The more I think about it – the more I realize that blogging is a little bit like an old friendship.  You may have noticed the long absence lately – and how rude of me to be gone for so long without a word or explanation.  But I know, you’ll forgive me and allow me to pick up where I left off.

Eton Mess

Eton Mess

Eton Mess

For the Eton Mess
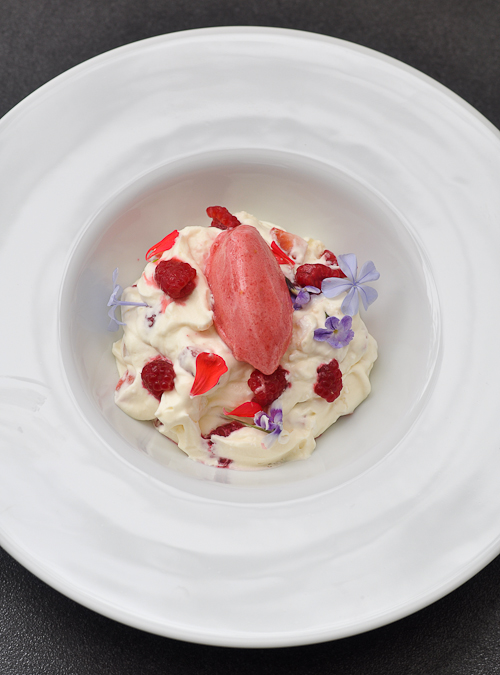
The inspiration for this Eton Mess comes from a recent dinner at District Dining which is Chef Warren Turnbull’s rendition of this classic dessert.

  • 3 egg whites
  • 150 grams caster sugar
  • pinch of cream of tartar
  • 250 ml cream
  • 1 vanilla bean, scraped
  • 50 grams icing sugar
  • 250 grams strawberries, quartered
  • Raspberry Sorbet (recipe follows)
  • Edible Flowers
  • Fresh or frozen Raspberries (for topping)
  1. Preheat the oven to 140c (fan forced). Beat the egg whites together with the cream of tartar in a bowl until frothy and then gradually add the sugar until stiff peaks.
  2. Spread the egg whites on a tray lined with baking paper and bake for 30 minutes. Remove from the oven and allow to cool.
  3. In a separate bowl, beat the cream until soft peaks and then gradually add the icing sugar and vanilla seeds, making sure not to overwhip the cream.
  4. Add the strawberries to the cream and gently fold in.
  5. To assemble, crumble the cooled meringue over the strawberries and cream and top with some raspberry sorbet, edible flowers and fresh raspberries.

For the Raspberry Sorbet

    This recipe is done on the thermomix. Feel free to use your own recipe or store bought if necessary.

  • 75 grams caster sugar
  • 150 grams frozen raspberries
  • 1 egg white
  1. Place the sugar into the TM bowl and mill for 10 seconds on speed 9
  2. Add the raspberries followed by the 350 grams of ice and egg white. Slowly turn the speed dial to speed 10.
  3. Use the spatula to assist in the incorporation of the raspberries with the ice.

Read Full Post »

Chocolate Carrot Cake Muffins

Chocolate Carrot Cake Muffins

When I was six my birthday fell on Easter Sunday.  I must tell you – this was probably the high point of my childhood.  I mean, how cool was that for MY birthday to fall on this day?  It was such a happy surprise and I wondered why I didn’t realize that this was the case for previous birthdays.  Easter egg hunt!  Birthday Cake!  Gifts! More Gifts! Party!!!

I spent most of the next year looking forward to my seventh birthday.  Dreaming about how to improve on that glorious birthday.  Could we get the Easter Bunny to make a surprise guest appearance?  What about a piñata in the shape of a rabbit?

My birthday bubble was shattered when I found out about a month before my seventh, that Easter Sunday wasn’t going to fall on my birthday (I know… I wasn’t thinking).  It was a rude awakening to discover that Easter Sunday changed every year.  No wonder I got weird looks When people asked me when my birthday was, I’d say “it’s the same day as Easter Sunday!”

Chocolate Carrot Cake

Chocolate Carrot Cake

(more…)

Read Full Post »

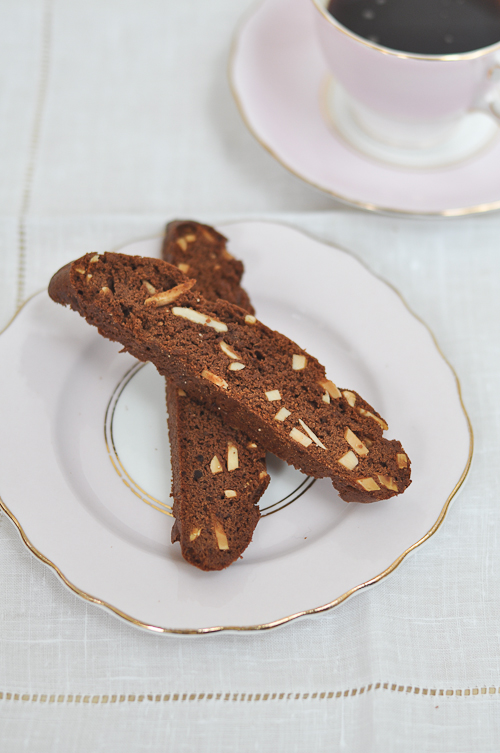
Chocolate Biscotti

Chocolate Biscotti

A work colleague once asked me if I order in restaurants the same way that I order coffee.  I thought his comment was pretty funny, especially since the weekend before my husband had said I was a waiter’s worst nightmare.

“What do you mean?” I asked my husband.

“Well, you like to change everything in the dish.  You want to order the steamed fish but have them fry it instead, and have the sauce on the side instead of pouring it over the fish – and if it comes with potatoes, you want rice instead!”  He said.

Surely he was exaggerating!

But I did have to concede to my work colleague that being finicky with my coffee never earned me any brownie points with the baristas.  One day I’m having a cappuccino with one sugar then the next I’m having it with one and a half sugars.  Then I learned that you get more milk with a latte so I switched to that (with one sugar).  Then I went off coffee and started having chai lattes – then soy chai lattes, then I missed my coffees and got back on to the lattes – but I wanted a weak latte, one and a half sugars and chocolate sprinkles on top…. oh and extra creamy.

And then I switched to tea – but that’s a whole different story altogether!

(more…)

Read Full Post »

Saying Goodbye

Blueberry and Pistachio Tart

Blueberry and Pistachio Tart

If you read my blog enough, you will know how crazy I am about my two dogs, Baci and Bizou.  They drive me crazy sometimes, and have more than once brought me to near bankruptcy with all the trips to the emergency hospital but there’s something priceless about loyalty and unconditional love.

I never did tell you about my very first dog did I?  When my husband’s dog gave birth, he had promised me the pick of the litter.   I chose Feliz – who had a gorgeous pale coat, broad head and always inquisitive eyes.  We used to have “this thing” where I would blow into her face and she would stick her tongue out as if she was blowing kisses right back at me.  This one kept me company when my husband left for New York to take his MBA.

When I left for Australia, I would call home often and my Dad would put me on speaker phone.  He told me that Feliz would run up and down the house when she heard my voice, looking for me and trying to figure out where the voice was coming from.  I found it uncanny how even after a year of being away she would still look for me when she heard my voice on the phone.

.

Feliz

Feliz

Over the years, as life got in the way, I called home less and wondered less frequently how she was doing.   At the back of my mind I always knew there were always going to be people taking care of her – so  less and less did I feel like she was still my dog.

Last week, my Dad broke the news that Feliz, who had over the years gotten weaker with age, had deteriorated dramatically.  She couldn’t stand up and had refused to eat.  The doctor said that her kidneys had failed and that she was suffering from bone disease.   My Mom told me that Feliz was in pain and had been crying.

I called home one last time and asked them to put me on speaker phone. I wanted to tell her that I loved her and that everything was going to be better. They told me that she lifted her head, wagged her tail, tried to stand up but couldn’t.

I knew then it was time to say goodbye.

Blueberry and Pistachio Tart

Blueberry and Pistachio Tart


Pistachio and Blueberry Tart

Sweet Shortcrust Pastry

  • 225 grams flour
  • 20 grams sugar
  • 1 teaspoon salt
  • 120 grams butter, cut into cubes, cold
  • 2 egg yolks
  • 1 to 2 tablespoons cold water
  1. Sift together the flour, sugar and salt. Using the tips of your fingers, incorporate the butter into the flour mixture until it resembles bread crumbs. Set aside.
  2. Beat the egg yolks into the flour mixture and add the water, a little at a time until you form a cohesive dough that comes together, the dough should be slightly sticky.
  3. Form the dough into a disc and wrap in cling wrap and refrigerate for at least 30 minutes.

Pistachio and Blueberry Filling

  • 125 grams butter, softened
  • 125 grams icing sugar
  • 3 eggs
  • Seeds of one scrapped vanilla bean
  • 80 grams ground pistachios
  • 45 grams almond meal
  • 30 grams flour
  • strawberry jam
  • one punnet of bluberries
  1. Cream the butter and the sugar together until the mixture is pale and light. Add the eggs, one at a time and scrape down the sides of the bowl as you go along. Add the vanilla bean seeds, the ground pistachios, almond meal and flour, incorporate the batter well.
  2. To assemble, roll out the pastry to line 6 mini tarts. Trim the excess on the sides. Chill the pastry for around 30 minutes in the refrigerator. Pre-heat a fan forced oven to 180c.
  3. Spread some strawberry jam on the base of the shell and top with the pistachio filling and place about three or four blueberries in the center of the tart.
  4. Bake for around 15 to 18 minutes.

Read Full Post »

Older Posts »