Feeds:
Posts
Comments

Posts Tagged ‘El Comedor’

Baked Spaghetti

Baked Spaghetti Royale

I swear, it wasn’t because I was unpopular.   (Or that’s what I would like to think)

One summer, I must have been in the  fifth or sixth grade, I celebrated my birthday with a party.  The downside of having your birthday in the summer months was that it always coincided with school holidays, which usually meant, only a handful of classmates could actually make it.

I never really thought it was a big thing until I was made painfully aware of this fact when, during this party, only three guests showed up.

(more…)

Read Full Post »

Lychee Perfection

In my younger years, perfection meant a number to me. For example:

4 – was the dress size I strove to become and so I ran every morning,  joined a gym and forced myself to eat oatmeal (although I hated it) for breakfast.

5 feet 5 inches was the height I thought was ideal for a size 4 – and so I took to wearing three inch heels everyday – even if  they hurt like hell.

10 was the number of guitar pieces that I wanted to know by heart – so that I could at least say that I could confidently play a whole set if asked.

28 was the age I wanted to get married.

And so my search for perfection went…

Lychees, rosewater, and cream jelly

As years passed and interestingly enough –  I didn’t feel the expected joy when some of these numbers I met and I didn’t feel as bad as I expected to when many of the numbers I didn’t achieve.  I’m not sure why – maybe I enjoyed the ride more than I did actually arriving at my destination.

And while I hate to admit it – I am still searching for perfection – although some of the things that mattered to me years ago – either I couldn’t care less about today, or have been adjusted to a more realistic number.  And then also, other numbers have taken priority.  You know what I mean?

That 4 dress size I so desperately wanted to achieve, well I’d be happy to fit into an 8 now!

I wear 2 inch heels instead of 3 now.

I’ve forgotten all the guitar pieces I know but no one ever asked me to play a full set anyway.

I did get married at 28!

And last night nothing pleased me more than to spend time with the Blog Monster as we searched for that 1 perfect lychee dessert.

Lychee Perfection

This dessert is really called Lychee Perfection.  It is a two layer jelly/mousse that is in my Grandmother’s cookbook.  I have adapted it by the addition of rosewater to the top layer.  Lychees are in season now and we are getting the most juicy and plump fruits you can imagine.  This is one of the best ways to celebrate them.  Don’t fret though if you can’t find fresh lychees – the canned ones are fine to use too.

Recipe

Bottom Layer

  • 1 envelope unflavoured powdered gelatin (7 grams)
  • 2 tablespoons boiling water
  • 1 can condensed milk (395 grams)
  • 200 grams cream, whipped

Top Layer

  • 1 envelope (7 grams) unflavoured powdered gelatin
  • 2 tablespoons boiling water plus 1 cup boiling water
  • 10 lychees peeled and chopped
  • 1/2 cup sugar
  • 1 tablespoon rosewater
  • pinch of rose food colouring

Lychee Perfection

  1. For the bottom layer, mix the boiling water and the gelatin in a container and set aside.
  2. In a double boiler, mix together the condensed milk and the gelatin mixture.
  3. Mix the gelatin mixture and continue cooking over the double boiler until the mixture thickens, around 5 minutes.
  4. Allow the condensed milk mixture to cool.
  5. Once the mixture has cooled, whip the cream until stiff peaks and fold the cream into the condensed milk mixture.
  6. Pour into individual glass containers and allow to set.
  7. For the top layer, mix the boiling water and the gelatin in a contained and set aside.
  8. Place the water, lychees, rosewater and sugar in a sauce pan.  Add the gelatin and bring to a boil.
  9. Remove from heat, strain the liquid into a bowl and set the bowl over another bowl of iced water and allow to cool.  As the mixture cools, add a tiny pinch of rose food colouring.
  10. Cut the lychees into pieces and place them over the cream jelly.
  11. Pour the rosewater mixture over the lychees and allow to set.

Stumble It!

Read Full Post »

Tortilla Española

Do you find that your taste in food changes over the years? I know a few people that used to detest fruitcake but now enjoy it.  Growing up, one of the only tapas I refused to eat was the Tortilla . For some reason I had this notion that because it was just made from onions, potatoes and eggs, it was so boring and when you were faced with a spread of garlicky prawns, creamy croquetas of chicken, or stuffed mussels, it was easy to overlook the tortilla.

A few years ago I reconsidered the tortilla and am glad I did.  With such simple (and might I add, limited!) ingredients – one of Spain’s most loved dishes is created.  The tortilla is simply a potato omelet.  However, the technique to making this is not that simple – the three tip  to a successful tortilla are:

  1. slice the potatoes thinly, using a mandolin if you can
  2. don’t fry the potatoes, instead, cook them slowly in olive oil, the idea is not to get too much colour on them
  3. don’t be afraid to practice “flipping” the tortilla – this is what gives it its shape.  When you first start, the smaller the skillet, the easier to flip.  You might want to first half this recipe and use a smaller skillet for the first few times.

But with anything, once you know the technique, it is fun to make.  This is the best “make ahead” dish I know.  This is one of the dishes I served at the recent foodbloggers picnic.  It is actually best served at room temperature but it is so versatile you can serve it hot or cold.

Eggs, potatoes, onions and olive oil - that's it!

Recipe – serves 6 as a tapa (adapted from Penelope Casas The Foods and Wines of Spain)

  • 1/2 cup olive oil
  • 4 large waxy potatoes, slicely finely
  • 1 onion, sliced finely
  • 4 eggs
  • salt and pepper to taste
  1. Heat some of the olive in a 20 cm skillet.  Add some of the  potato slices so that you cover the skillet with a layer of the potatoes.  Next, add some of the onions and season with salt.  Alternate the potatoes and onions, adding olive oil as you go.  So basically it is potatoes, then onions, the salt, then a drizzle of olive oil before you add on the next layers.  Potatoes, onions, salt, olive oil etc.  Cook this over medium heat, turning the mixture once in a while until the potatoes are tender but not browned.  This took me around 15 minutes but cooking times can vary.
  2. When the potatoes are done, they should be tender enough to be pricked with a fork without any resistance, drain them in a colander, reserving the olive oil to use for cooking the rest of the omelet.  If there is more oil than what you need, don’t throw it away – this can be used for cooking other things as well so save it for future use.
  3. Beat the eggs in a bowl and add the drained potato mixture and let sit for around 15 minutes.
  4. Clean the skillet and heat 2 tablespoons of the olive in the large skillet until very hot and add the potato mixture, rapidly spreading it out in the skillet.  Lower the heat to medium and shake the pan often to prevent sticking. Use a thin spatula to run along the sides of the skillet so that some of the egg can run under and cook more evenly.  This takes around 6 to 8 minutes.
  5. When the mixture begins to brown and just before you flip the tortilla, loosen it by sliding a thin spatula between the egg and the side of the skillet walls. Place a plate slightly larger than the skillet over the skillet.  Remove the skillet from the heat and flip the omelet on to the plate so you can brown the other side.
  6. Add about 2 tablespoons more to the skillet, and then slide the flipped omelet back on to the skillet so that the cooked side is facing the top.  Cook the omelet for another 5 minutes over medium heat.
  7. Flip the omelet 2 or 3 more times (this helps to give a good shape), cooking briefly on each side.
  8. Transfer to a plate, use some kitchen paper to drain the excess oil.
  9. Cut into wedges, place a toothpick on each wedge (and a chorizo adds a nice touch too).

Stumble It!

Read Full Post »

The Spanish Pasta Dish to Rival Paella

Fideos (“Toasted Pasta” Paella)

It must be difficult being a noodle in Spain.  How can you stand up to the wonderful rice dishes that the Spaniards are known for.  Almost every Spanish cookbook I own will have a section on Paellas*, and at the back of the section is maybe one (if lucky) recipe on the fideos.  It doesn’t even get its own section!   It’s a pity that fideos tends to take second place to the Paella when I think it is just as delicious – and for me, a much more forgiving dish!

Fideos, translated into english, refers to noodles – they are thin pieces of noodles, no longer than your thumb.  Many recipes call for fideo noodles, there is no reason why you can’t use thin spaghetti or angel hair noodles, broken into 1.5 to 2 inch lengths.  In my Mom’s restaurant they used to bake their fideos with pork spareribs and sausages but today I’ve decided to share with you my version – with mussels and prawns.  A little bit healthier and just as good!

I like to think of fideos as the rebel dish.  It breaks a lot of rules!  Let me explain… with most pasta dishes you throw your noodles into a large pot of boiling water, enough water so that the pasta has enough space to float around.  With fideos, traditionally they are made in a paella pan and only enough liquid is placed so that the noodles absorb the cooking broth resulting in a rich, and flavourful dish.  When making a paella, I’ve been taught, once you add the broth, do not stir rice around.  How many of us have been tempted to STIR when we were told NOT TO STIR?!  Well, as I said, fideos is more forgiving – you stir the dish often enough until you see that the liquid has coated the noodles and seafood in an almost syrup like coating.

Traditionally fideos has been made with saffron.  If you aren’t willing to spend on good quality saffron, I wouldn’t even bother putting it as inferior quality saffron will hardly make a dent in the taste.  If you can’t get a hold of saffron, or don’t wish to shell out the money for it, I suggest you omit it completely.

Also, this is traditionally made in a paella pan.  Tonight, I couldn’t be bothered and  used a heavy based pan instead.  It turned out just as well!

As I said – this dish breaks a lot of rules!

Prawn and Mussel Fideos

Recipe (for two)

  • 120 grams fideos or dried angel hair pasta, broken into 2 inch lenghts
  • 3 tablespoons olive oil
  • 1/2 onion, finely diced
  • 2 cloves garlic, crushed
  • 1 teaspoon sweet paprika
  • 2oo grams canned tomatoes,  crushed
  • 375 ml fish or chicken stock (good quality store bought is fine)
  • 70 ml dry white wine
  • 1 bay leaf
  • 6 large prawns, peeled and deveined
  • a handful of mussels, cleaned and debearded OR you can use clams or a combination
  • salt and pepper to taste
  1. Heat a pan with one tablespoon of olive oil and lightly fry the fideos noodles until golden brown but not burned.   This should take around 5 minutes.
  2. Remove the noodles from the pan and set aside
  3. Next, add more olive oil and saute the onion and garlic until translucent.
  4. Add the sweet paprika and the canned tomatoes and cook until the tomato sauce is thick, this will take around 10 to 15 minutes.
  5. In a separate pan, heat the stock, white wine and the bay leaf.    Once boiling, add this to the tomato sauce.
  6. Immediately add the noodles and stir frequently until the noodles have absorbed the liquid.  This took me around 15 minutes.
  7. When you can see that the noodles are almost done, add the seafood and simmer gently for a minute or two until the prawns are cooked through and the mussels have fully opened.
  8. Serve immediately.

Fideos

*Interestingly enough, what we have come to know as Paella the rice dish made with all sorts of wonderful toppings from seafood, chorizo, rabbit etc., actually refers to the pan in which they are made in.  Over time however, people have started referring to the dish inself and not the pan as Paella.

Stumble It!

Read Full Post »

Stuffed Mussels with ham, bechamel and melted cheese

When I was little, I would sometimes tag along with my Mom when she went to work.  Work, being her Spanish restaurant.  Over the 34  or so years of El Comedor (that means the “Dining Room” which was what the restaurant was called), some of my best memories was when I was allowed inside the kitchen to watch the cooks as they went about their work.

None of the cooks in El Comedor ever went to cooking school, I am pretty sure none of them even graduated high school.  They originally started as  house help (doing the cleaning) for my Grandmother (who we fondly called Mama).

When she started the restaurant they were tasked to cook in the kitchen.

Imagine if you will, a young man, Manny (his nickname for Manuel), who has never finished high school, who has never picked up a cookbook in his life, never held a chef’s knife, never tasted paella,  being asked to give up cleaning, the only job he has ever known,  to cook in a fine dining Spanish restaurant?  It must have taken a leap of faith by my Grandmother, and Manny to both give it a go!

When Ellie mentioned Spanish food to me recently, I realized that I have been very delinquent in posting some of the delicious recipes I remember eating so many years ago when Manny would sneak a little tapa to me while no one was looking. I must have looked like a drooling labrador to him, just watching him cook.  And I guess he took pity on me.

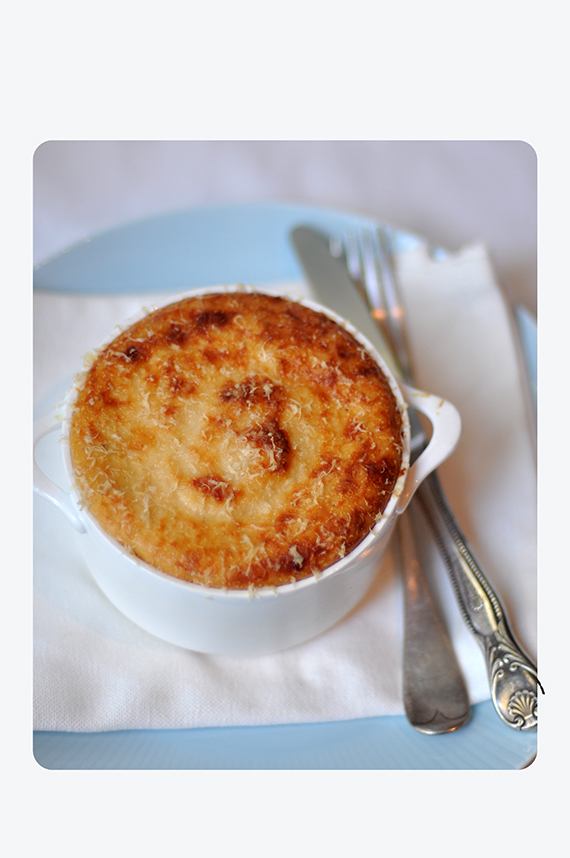
“Don’t tell your Mom okay?” he would say as he handed me a little croqueta or some of the stuffed mussels pictured above.  At the restaurant we called them Mejillones Relleñadas.     I call them – Mussels a la Manny.  They are made with mussels, ham, white wine, an uber creamy bechamel sauce and topped with parmesan cheese. This recipe is so simple and you can make it ahead, just top with parmesan cheese and let it rest in the refrigerator until you are ready to serve.  It’s perfect when you are expecting guests – just bake them in the oven prior to serving.

Sadly,  Manny passed away a few years ago but to this day I still think of him when I make this dish – from something that has very humble beginnings – such a beautiful dish!

Buen Provecho Manny!

They're delicious even without baking!

Recipe

  • 25 mussels, cleaned and debearded
  • 3 tablespoons butter
  • 1 tablespoon olive oil
  • 1/2 onion, diced
  • 2 cloves garlic, crushed
  • 1/4 cup ham, finely diced
  • 1/4 cup flour
  • 1/4 cup white wine
  • 3/4 cup milk
  • 3 tablespoons chopped parsley
  • grated parmesan cheese to top
  • salt and pepper to taste

Top with a sprinkle of parmesan cheese

  1. Place the mussels in a pot of cold water and bring to the boil.  When they are open, remove from the heat to cool.  Be careful not to overcook.  When they are cool enough to handle, remove the meat and chop (not too finely) and reserve half of the mussel shell.
  2. Heat the butter and olive oil in a sauce pan and add the onions, salt and pepper.  Add the garlic and cook until translucent.
  3. Add the ham and cook for another 2 minutes over medium heat.
  4. Add the flour and cook out for a few minutes, then add the white wine and cook for two minutes, and then gradually add the milk.
  5. Add the chopped mussel meat and the parsley.
  6. Place a spoonful on the reserved mussel shell.
  7. Top with parmesan cheese and bake in a 180c (fan forced) oven for 10 minutes until the cheese has melted.

Stuffed Mussels with ham, bechamel and parmesan cheese

BY THE WAY, on the side of this post is a link called RECEIVE EMAIL!  If you would like to be on my mailing list and receive an email when a new post is up – please click on the link.  Thank you!

Stumble It!

Read Full Post »

Croquetas de Pollo

Croquetas de Pollo

Chicken Croquettes

Chicken Croquettes

Everytime we would eat at El Comedor, among the tapas we could order, my favourite were the Croquetas de Pollo (Chicken Croquettes).  I would usually order two serves at a time, one for me and one to share with others in the table because, well, they were everyone’s favourite too!

In Madrid, the best Croquetas can be found at Lhardy.  During my last trip, I visited the tapas bar/pastry shop several times.  The most memorable time was when I bought a box of TWENTY croquetas.  I wanted to take them back to the hotel and give my husband ten of them.

On my way home I finished one and then another…. and pretty soon I had eaten the whole box!  Mortified, I rushed back to  the store to buy some more for my husband.  However, the store had run out of them already so I went back to the hotel and fessed up.

Expecting the worst, I was pleasantly surprised when my husband said that it was all fine – all he asked was that when we got back to Sydney I’d make a batch of the Croquetas using El Comedor’s recipe – he said they were just as good!  So here it is.  El Comedor’s Croquetas de Pollo.  Buen Provecho!

Ingredients

  • 4 Tablespoons oil or butter
  • 1/2 onion, minced
  • 1/4 cup plus 2 tablespoons flour
  • 250 ml milk (or you can used 125 ml milk and 125 ml chicken stock) – Note:  This should be warm, you can microwave it for a few seconds before pouring into the flour mixture
  • pinch of nutmeg
  • 1/2 teaspoon salt
  • 1/2 cup cooked chicken, finely shredded
  • 1/4 cup finely chopped ham
  • 2 beaten eggs
  • flour for dusting
  • 1 1/2 cups of breadcrumbs
  • oil for deep frying
  1. Heat the oil or butter in a saucepan and saute the minced onions until transparent over medium heat.  Do not allow them to brown.  Stir in the flour and cook briefly, then whisk in the milk a little at a time, stirring constantly (around 5 minutes to cook the flour out) until the sauce thickens.
  2. Season with the nutmeg, salt and pepper.  Stir in the cooked and chopped filling.  Spread the mixture on to a dish and refrigerate until this becomes solid.
  3. Place the beaten eggs, flour and breadcrumbs in three separate dishes.  With moistened hands, form the croquetas mixture into balls or cylinders.  Dip each one first in the flour, then egg and finally the breadcrumbs.
  4. Now you are ready to either fry them in a deep fryer (which is my preference) or a pot filled with oil at least 1/2 inch deep.  Fry them for at least 3 to 5 minutes until golden brown.

Note:  These are best eaten right after frying. If you have some left over (this recipe makes about 20 pieces), may I suggest freezing the leftover UNFRIED croquettes and frying them another time. If frozen, you can fry them straight away in a deep fryer for 5 to 7 minutes. DO NOT use a pot to fry frozen croquettes.  They will splatter too much and can be very dangerous.

Variations

  • Tuna
  • Cheese
  • Prawns
  • Mushrooms

DSC_0073

Read Full Post »

044

Brittle Torte - an El Comedor Speciality!

Brittle Torte - an El Comedor Speciality!

Brittle Torte was my favourite dessert at El Comedor.  To me it seemed like such a decadent  looking cake and it stood so tall and proud with the brittle (I think they call it hokey pokey here) sticking out.  I have always been a little intimidated to make this recipe but  I finally decided to have a go.  The conclusion?  It wasn’t as hard as I anticipated.  You will definitely need to plan ahead and maybe read the recipe a few times before you begin (I didn’t and realized half way through that I lacked baking soda to make the cake!).

This cake has two layers and sandwiched in between is a generous layer of fresh strawberries and cream.  It is covered with even more cream and topped with more strawberries and the brittle.  While it is a large cake (you will need an angel food pan), it is very light because it is leavened with air.  When I first read the recipe I was surprised to learn that the sponge was not made with butter.  No wonder I managed to eat two slices at a time!

Ingredients

For the Cake

  • 1 1/2 cups flour, sifted twice
  • 3/4 cup sugar (for the cake)
  • 8 egg yolks
  • 1/4 cup cold water
  • 1 tablespoon lemon juice
  • 1 teaspoon vanilla
  • 8 egg whites
  • 1 teaspoon cream of tartar
  • 1 teaspoon sale
  • 3/4 cup sugar
  1. Preheat the oven to 180 C.
  2. Sift the flour twice and add 3/4 cup sugar into a bowl.  Make a well in the center and add the egg yolks, water, lemon juice and vanilla.  Beat until smooth (I used the kitchen aid to make things easier)
  3. Beat the egg whites with cream of tartar and salt until very soft peaks form.  Add the remaining sugar gradually, 2 tablespoons at a time.  Continue to beat until still meringue forms.

    The egg yolk and meringue mixture

    The egg yolk and meringue mixture

  4. Fold the first mixture gently into the meringue.  Pour the batter into an ungreased 10 inch tube pan.  Carefully cut through the batter, going around the tube 5 or 6 times with a knife to break large air bubbles.

    Make sure the pan is ungreased which will help the mixture rise in the oven

    Make sure the pan is ungreased which will help the mixture rise in the oven

  1. Bake for 50 to 55 minutes or until the top springs when lightly touched.
  2. Cool the cake.  Remove it and split crosswise in 4 equal layers (I only did 2 layers).  Put the layers together with the whipped cream and brittle. For my variation, I only split the cake into two layers and layered it with strawberries.

For Whipped Cream

  • 2 cups thickened cream
  • 1/2 cup powdered sugar
  • 1 tsp vanilla

Whip the cream (again, the kitchen aid was indispensable).  When you have almost reached the stiff peak stage, add the sugar and then the vanilla.

For the Brittle Topping

  • 3/4 cup sugar
  • 1/8 teaspoon instant coffee
  • 2 tablespoons light corn syrup
  • 2 tablespoons hot water
  • 1 1/2 teaspoons baking soda
  1. In a saucepan, combine the sugar, coffee, corn syrup and water.  Stir well.
  2. Cook to hard-crack stage (148C) over medium high heat.
  3. Remove from the heat and immediately add the baking soda.  Stir vigorously, but only until the mixture blends and pulls away from the sides of the pan.
  4. Quickly pour the foamy mixture into an ungreased shallow metal pan.  Do not spread or stir.  Let stand until cool.  Knock out the pan and crush the brittle into chunks.

    Here is the brittle

    Here is the brittle

Assembly

When the cake is cool, spread the whipped cream between the layers (see above) and the remainder over the top and sides of the cake.  Cover the top and sides with candy.  You may also sprinkle with blanched almond halves if desired.

Again my variation, I only used two layers where is sandwiched cream and strawberries and topped with strawberries and brittle.

Split the layers and sandwich with strawberries

Split the layers and sandwich with strawberries

Next cover with cream and the next cake layer

Next cover with cream and the next cake layer

Enjoy!

A slice of brittle torte

A slice of brittle torte

Read Full Post »