Feeds:
Posts
Comments

Archive for the ‘Healthy’ Category

IMG_5648.JPG

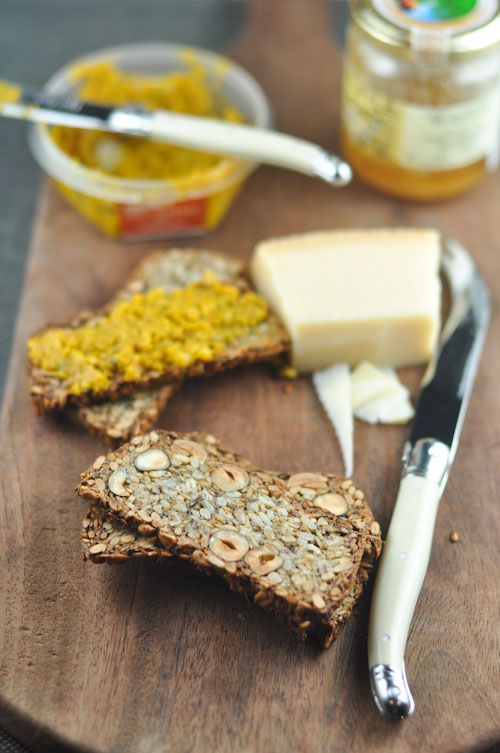
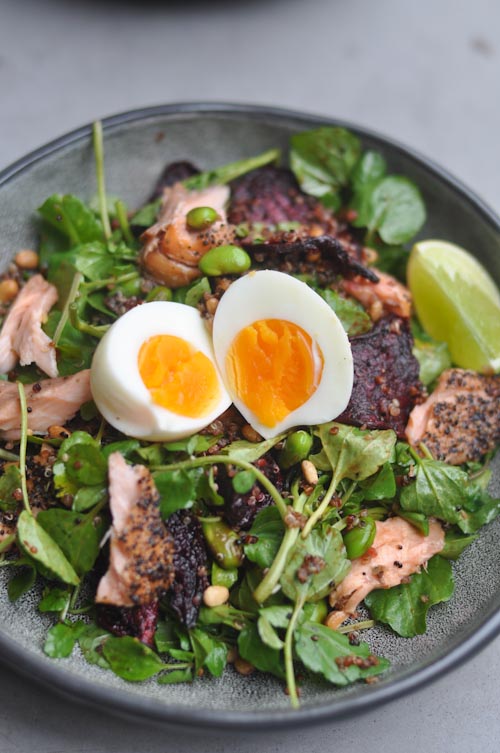
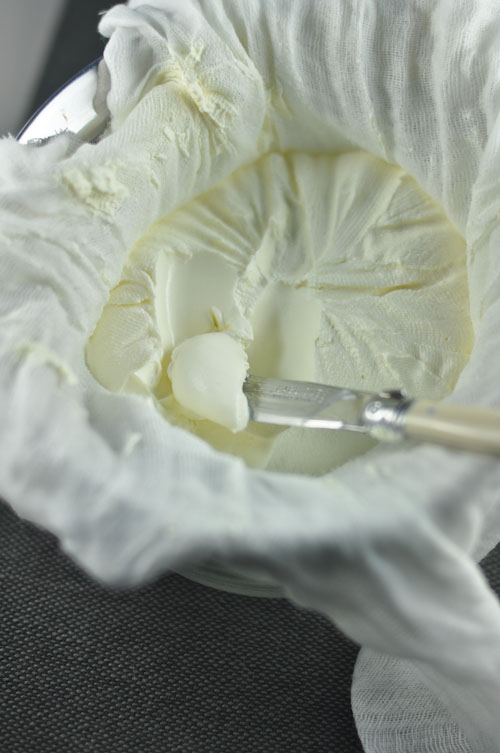
Hi!  I know it’s been ages.  You’re probably wondering if I’m here to make an appearance and then disappear after one or two posts… maybe… I don’t know.  But this recipe was too good to pass-up and not share with you.  I know I’ve jumped on the poke bandwagon a little bit late but – this is a revelation.  I have always wanted to have poke bowls for lunch but buying fresh fish and taking it to work has never been an option and the prices for sashimi in the food court at work is ridiculously expensive. So why not buy salmon and cook it sous vide and use that for poke.  The texture is pretty close to sashimi (maybe a little bit on the firmer side) and you can store it for a few days in the fridge if you’re not ready to use it.  Yes, this is super easy to put together and if you aren’t inclined to sous vide your fish – maybe use tofu or prawns instead – even chicken… I don’t know… I don’t even know if this is even a poke bowl anymore… maybe it’s just a soba salad that is disguised as a poke bowl?!?  I’ve brought it to work a couple of times already and it tastes awesome – so yes, you’re welcome.  Haha!

In case, you ARE wondering what happened to me since the last time I posted – well, YOGA took over my life…. and Pilates as well.  In the last year I took a teacher training course in Pilates (two actually but I kinda failed the first one!) and then I decided to take a Yoga 300 hour Teacher Training in Thailand… and now doing another  200 hour training.  I am hoping one day to find a way to blend my passion for food and “movement” (mostly Yoga).  If and only if you ARE interested (and why wouldn’t you be?!) go check out Trissalicious on Instagram. Follow me there – you’ll probably get to see a little bit more of me there.

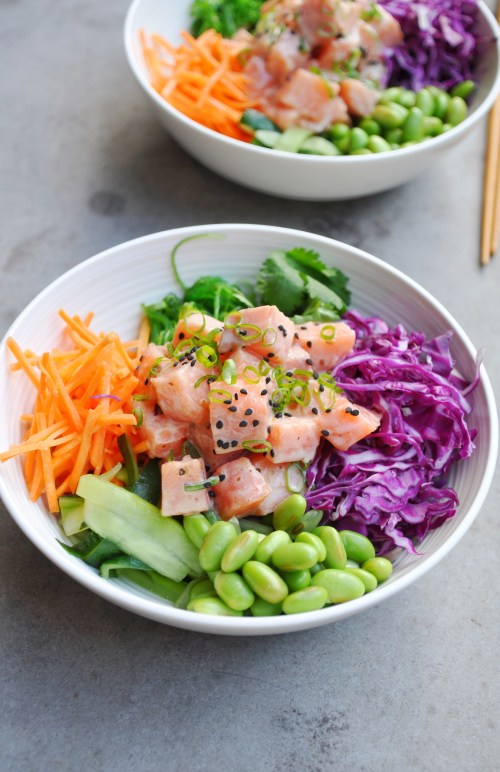
Salmon Poke with Soba Noodles

Serves Two

    • 2 salmon fillets, sous vide 100 grams each
    • 1 tsp black sesame seeds
    • 2 tsps finely chopped green onions
    • Shredded Carrots
    • Shredded Red Cabbage
    • Edamame
    • Japanese Seaweed
    • Soba Noodles
    • Pickled Cucumber
    • Roasted Sesame Sauce (I used Kewpie)
    1. First Make the Sous Vide Salmon.  I suggest using the recipe here.
    2. Once you are ready to use the salmon, mix around 2 tbsp of roasted sesame sauce and top with black sesame seeds and finely chopped green onions.
    3. Top with the carrots, cabbage, edamame, seaweed, cucumber and whatever else you’d like to add.

Read Full Post »

Life Changing Cracker

A few days ago I stumbled across a recipe for “Life Changing Bread”. Again, normally I would be skeptical about such a bold statement but given that I had recently made a bold statement of my own, I gave this recipe the benefit of the doubt. So off I went to the health food store to buy ingredients I had never ever heard of (psyllium, flax seed, chia) and $15 later (this was going to be one expensive loaf of bread!) I was ready to bake.

Essentially you mix all the dry ingredients together and bind it with a combination of water, maple syrup and coconut oil. Then you let the bread sit, and then bake for 20 minutes, turn the loaf over and bake for another 40 minutes, then let rest until cool. Was it good? Yes. Was it Life Changing? I’ll have to be honest and say not really. I found the texture to be a little bit… slimy.

Now I normally don’t like eating the edges in a loaf of bread, but I found the edges of this loaf to be particularly yummy – nutty and crispy. So why not slice the rest of the loaf and bake it again to get dry out the dough like a biscotti? So I sliced the rest of the loaf in to thin slices and baked at 175 c for 20 minutes.

Success! This time, the crackers were amazing, on it’s own, topped with pumpkin and cashew spread, topped with cheese and truffle honey etc. The crackers were delicious!
It was only after that I realized that blogger who posted this recipe also had a recipe for Life Changing Crackers on her blog. The technique is different though, it that she spreads the mixture in between two sheets of baking paper and rolls in to a thin sheet.

Whichever way you decide to make the crackers (baking it a third time like I did, or rolling it out in to thin sheets), this is a winner recipe… and dare I agree? Life Changing!

Life Changing Cracker topped with pumpkin and cashew dip

Life Changing Cracker topped with pumpkin and cashew dip

Read Full Post »

Superfood Salad

Superfood Salad

I am one of those people that are always skeptical of anything “healthy and delicious”. I used to think those two words could never co-exist in the same plate, like “airline food” or “diet ice cream”. I must admit though, in the last few months I’ve had to eat my words, so to speak. I now love to challenge myself to find tasty and healthy food and my salad is the poster child for this. The “fitspiration” comes from a little cafe near where I work called “The Nook”. Smoked Trout, Watercress, Quinoa, Edamame, Beetroot…How can you go wrong with an ingredient list that sounds like a superfood checklist?

I hope I can convince you to try it – I know it’s a bold claim – is this really the best ever Superfood Salad? You’ll have to try it and let me know!

No particular recipe here today – just a general guideline on how I put this together.

Chunks of Black Pepper covered Hot Smoked Trout (or Salmon)
Watercress
Edamame
Quinoa
Hardboiled Egg (or a poached egg would be great)
Roasted Beetroot (sliced beetroot drizzled with olive oil and seasoned, then roasted for 25 min at 200c)
Toasted Pine nuts
Caramelized Balsamic Vinegar and a squeeze of lime to dress the salad

Read Full Post »

Pam's Fresh Lumpia

Pam’s Fresh Lumpia

I met Pam over a year ago when I held a macaron class to raise money for the victims of Typhoon Haiyan. She signed up for the class and we got along straight away (it helped when I found out she worked in the food industry!). When the class ended, everyone left, but Pam and Kath stayed for lunch and that was the start of our friendship. Today, Pam is not only a great friend to me, but she is equally close to my siblings. She has an open invitation to all our family gatherings.

I learned this recipe from Pam. It comes from her Ama (grandmother). If I remember correctly, her Ama used to make this and another dish, Misua noodles, whenever it was someone’s birthday in their family. Then her Ama would personally deliver the food to each family. What a lovely tradition! One night Pam made this and the Misua for our family. It wasn’t anyone’s birthday but the amount of work she put in to the two dishes made all of us feel like it was!

I could eat this every day. Actually, that is a fact. There was a period where I must have eaten this for dinner two straight weeks – sometimes lunch and dinner. This is one of those dishes that tastes so good and is so filling that you don’t miss the fact that there is no meat! Two things I’ve changed – I’ve omitted the fresh lumpia/spring roll wrappers but you could easily purchase this from the frozen section of your grocery. I also omitted the sweet garlic sauce that you pour over the spring rolls. This recipe makes a lot – enough for at least 6 people. It also keeps well so great to make ahead.

Ama’s Lumpia

  • 50 ml vegetable oil
  • 2 onions, sliced
  • 3 garlic cloves
  • 2 tablespoons chicken powder
  • 4 large carrots, peeled and grated
  • 1/2 head of cabbage, sliced
  • 300 grams green beans, diced into 1 cm pieces
  • 500 grams firm tofu, drained and diced into 1 to 2 cm pieces
  • 200 grams crushed peanuts
  • 2 teaspoons sugar
  • 1 teaspoon salt
  • Coriander leaves for garnish
  • Optional: Cut nori sheets for garnish
  • Fresh lettuce leaves to serve
  1. In a large pot, heat the oil and add the onion, saute until translucent. Add the garlic and chicken powder (for seasoning)and cook for two to three minutes.
  2. Add the grated carrots and cook until wilted, around 5 to 7 minutes on medium heat. Add the cabbage and continue to cook until the cabbage is slightly wilted, around 10 minutes. At this stage, you will notice a lot of liquid seeping out of the vegetables. Add the green beans continue to cook around 5 more minutes. You are looking for the beans to soften but retain some bite.
  3. Finally, add the tofu and mix into the vegetables and cook for another two to three minutes. (Optional step:Pam drained the vegetable/tofu filling before assembly.)
  4. Make the crushed peanut mixture by processing the peanuts, sugar and salt in a food processor for a few seconds
  5. To serve, place a heaping spoon on to the lettuce leaves, add the crushed peanut mixture, top with coriander and nori.

Read Full Post »

Hazelnut, Labneh and Honey Toast

Hazelnut, Labneh and Honey Toast

Oh wow – how time flies. My poor neglected blog. It’s been nearly a year since I wrote anything and somehow I feel like I have to give you an excuse for the silence… The reality is life got in the way. New passions (Yoga! Running!), work, travel and I started trying to be healthier too. Somehow, it didn’t make sense for me to cook the same rich and heavy food I used to. I didn’t have time to make long and complicated recipes anymore… So the blog took a long break.

Sometimes people would ask me if I still updated my blog and I would always shrug it off and say “I’m too busy” but at the back of my mind, I knew I would one day revive it and maybe today’s the day? Who knows… I have good intentions and great (mostly healthy) recipes to share but I’ve also been there before where I’ve resurrected this blog with a few posts for a month or two… so let’s see. Hopefully this is a new beginning – a simple new beginning.

This is not so much a recipe but a guide to make pretty amazing toast. I don’t even need to write the recipe down – it’s that simple.

Start with some homemade labneh. Get some full cream Greek yogurt, and place it in a muslin/cheese cloth. Place the muslin over a strainer and the strainer over a bowl which will allow the whey to drain from the yogurt. Wait 24 hours before serving.

The toast some hazelnuts, in an oven at 160c for 15 minutes, and chop. Get some good quality sourdough (I used soy and linseed) and spread the labneh, then the roasted hazelnuts and finally some honey (I used honeycomb) and a pinch of salt. Bon Appetit, where I got the recipe from, also suggests some olive oil and a few turns of pepper which sounds lovely as well.

Homemade Labneh

Homemade Labneh

Read Full Post »